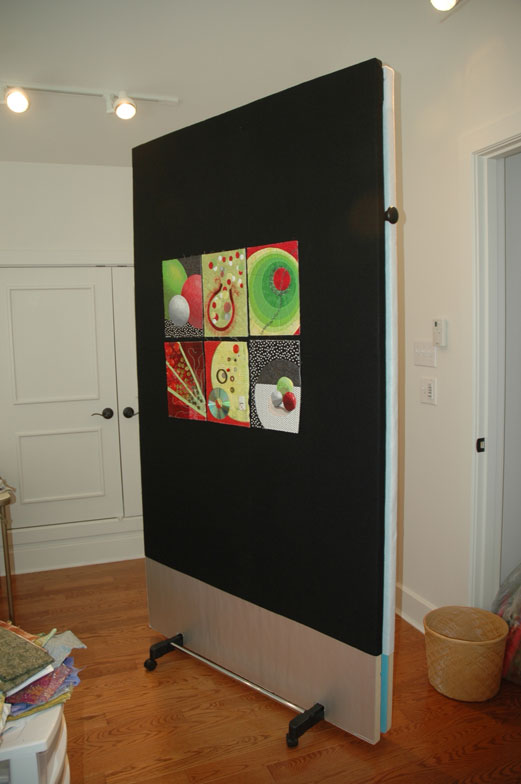
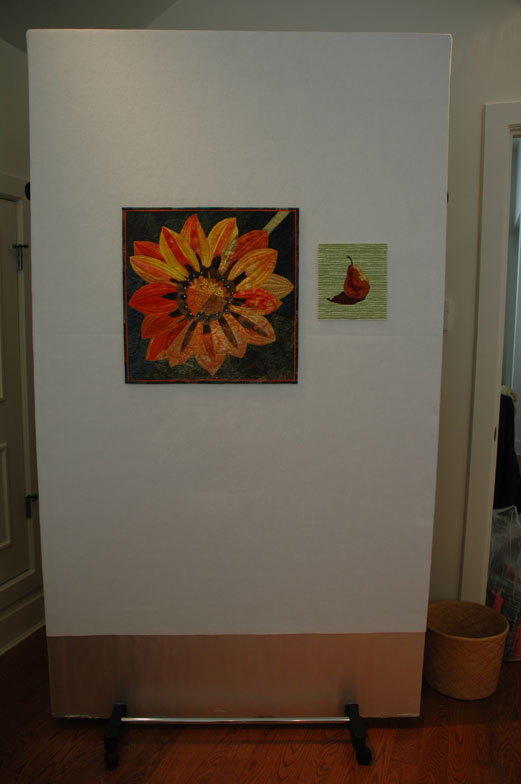
 Thanks to lots of innovative people on the QuiltArt list and elsewhere, I’ve constructed a new portable design wall for the studio. With all the wonderful under-eave storage we had installed during the building process, there was little wall space left for a fixed design wall. So after viewing several examples and reading several summaries online, we purchased a rolling clothes rack (Bed, Bath and Beyond), two 4’x8′ boards of insulation (Home Depot) and some 72″ wide felt (JoAnn’s). I decided to make one side white and the other side black, mostly because I could see advantages to both colors and couldn’t settle on just one.
 We cut the boards to 7′ and notched the bottom edges to fit over the bottom of the rolling rack. Next we covered each board with felt. We used spray adhesive to glue the two sides together around the rack – the pieces of leftover insulation board were cut to size and positioned between the two large panels, sprayed with glue, and pressed together. We laid it down and weighted it overnight… and voila!
I’ve already used the wall to photograph a new quilt. Between the lights in the studio and the light streaming in from the windows the texture shows up very well. And I can move it around to get the desired effect. And it’s ready just in time to start a new project.

Great job on the design wall! I had an especially frustrating photography session yesterday and am determined to have a better set up next time. I think a design wall like yours will be the answer.
All best,
Lora
You will so appreciate your new design wall. Nice job, Lynn. It has made a huge impact on my design techniques. Another picture of the red, green and black beauty in the future?? Happy Sewing, Colleen
Lynn, this looks like a fabulous solution when no walls are available to hang a design wall on! I’m going to try to make one of my own. Just wondering how it has stood up – are you still using it?
Hi Terry,
Thanks for commenting on my blog about my design wall. It still works great. I have even laid it down flat to block things. The only thing that I would do differently would be to use something more permanent to affix the felt to the insulation board. After a while the duct tape starts to let go but so far I haven’t had to replace anything.
Have fun making yours. I’d love to see a photo when you’re done and to know how it worked out for you.
How thick was the insulation board & how much did you pay for the rolling garment rack at BB&B.
I have been wanting to do something like this for a while, but wasn’t sure how to go about it…..thanks for showing us how!!!
Thank you so much for sharing this. I hope BB&B still has that rolling clothes rack.
Did you buy the $200 rolling clothes rack – or did you find something more reasonable??
Hi there:) is there any chance you can make a quick video on how you put this together? I have to make this for a thesis project and im confused 😦 you would be so helpful :):):)
I would use a spray adhesive to attach the felt to the wall. Wonderful idea!
Oh my goodness! Incredible article dude! Thanks, However I am going through troubles
with your RSS. I don’t understand the reason why I can’t join it.
Is there anyone else having the same RSS problems? Anyone that knows the
solution can you kindly respond? Thanks!!
Oh my goodness! Amazing article dude! Thank you so much, However I am having issues with
your RSS. I don’t know why I can’t join it.
Is there anybody else getting the same RSS issues? Anybody who knows the answer can you kindly respond?
Thanks!!
Hey,
Nice idea. My wife has been trying to explain how your wall was assembled. Please would you create a drawing from me. I’m a visual learner.
My theory is there is either an “air gap” between the two 4×7 foot boards or you used the waste piece to strengthen the entire design wall, bracing the wall like a swinging back yard gate. She said the remaining piece is between the two 4×7 foot boards Whose correct ?
Your photo makes the two foam core boards look congruent ( with no air gap ) between the two. So, I figured you used the remaining 1 foot wide x 7 foot “waste piece” to serve as a horizontal or vertical bracenmaking the congruent 4×7 finished Wall ( the working area ) stronger. I apologize but I’m a visual learner & her explsnstion isn’t making sense.
Can you help me out. Thanks, Eugene Louie 408-438-6788; email eugenelouie@gmail.com
Can you take a picture showing where the narrow 1’ x 7’ strip now lives ?
If some one wants to be updated with hottest technologies then he must
be go to see this web site and be up to date all the time.
Love the two sided idea. I just did the same thing using a cloths hanger myself but only one side! I love it. I may be adding to it to make mine a two sided as well!!
I just booked my first consultation with the best interior designer in Delhi NCR that my friend recommended. Excited to see what design ideas they come up with for my small apartment!